
Few things are more frustrating than uploading your interior and getting a margin error — or seeing text cut off at the Launch Previewer stage.
The fix is simple: set up your pages at the right size from the start, and keep everything inside KDP’s margins. This guide shows you how, and gives you free templates that do the hard part for you.
Bleed or No Bleed — What’s the Difference?
Trim size is the final size of your printed book — for example 6 x 9 in.
When Amazon prints your book, the pages are printed on bigger sheets and then cut down to that trim size. The cut is never perfectly exact, so KDP gives you two options:
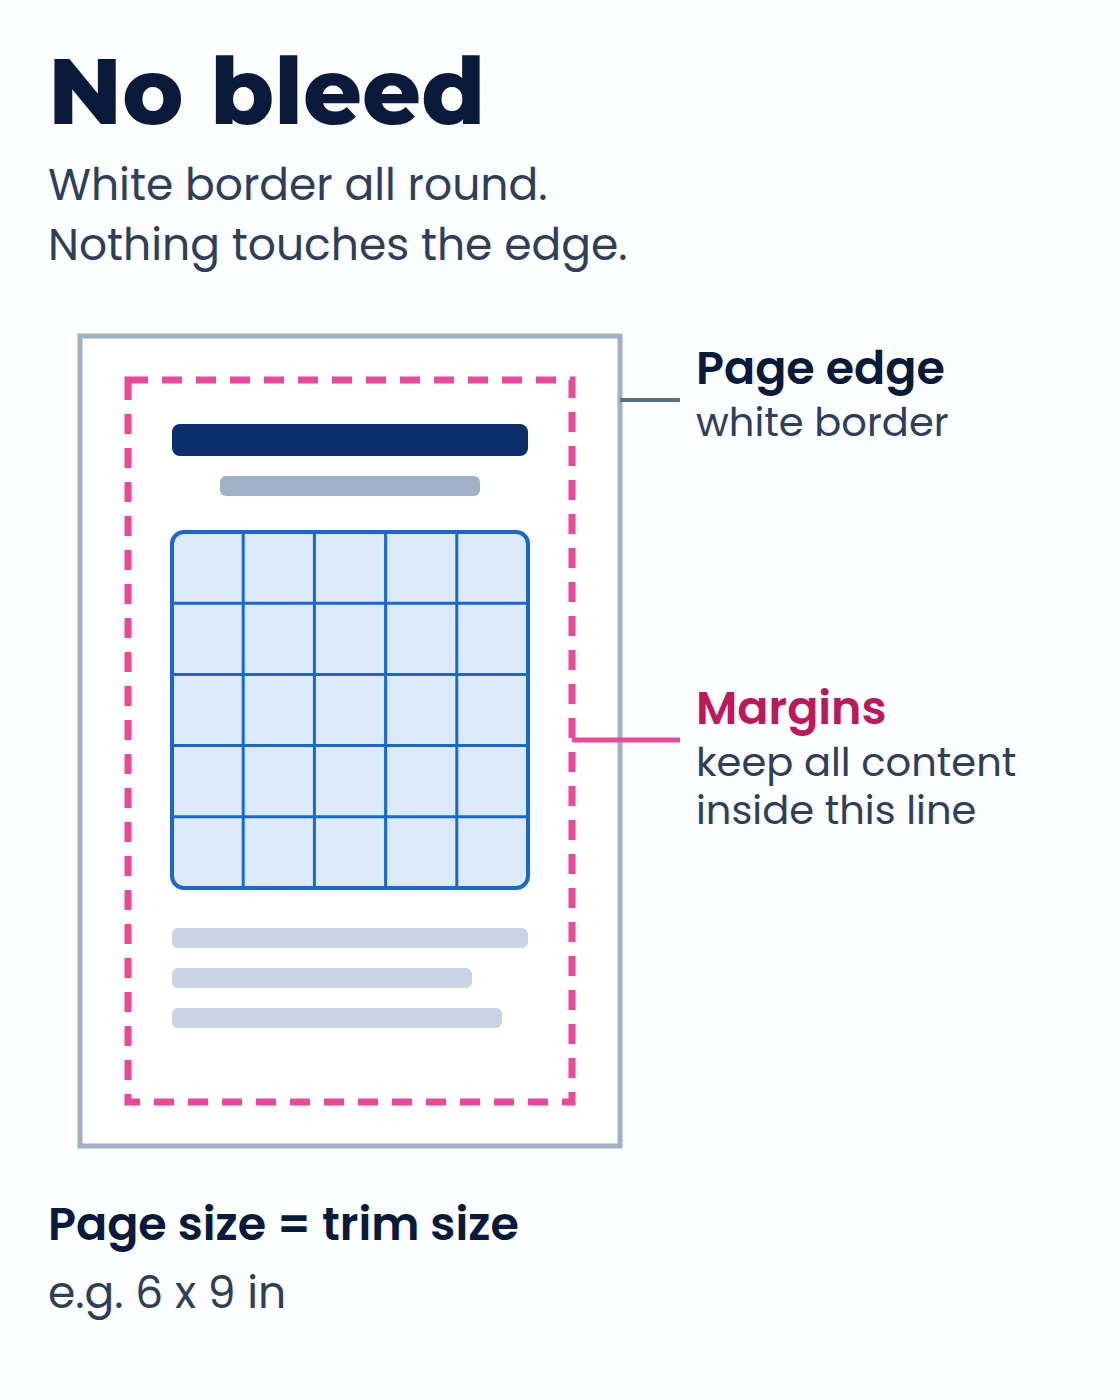
No bleed
Your pages have a white border all the way around. Nothing touches the edge of the page.
Use no bleed when: your pages have a plain white background and all your content sits away from the edges. This covers most journals, log books, planners, puzzle books and activity books.
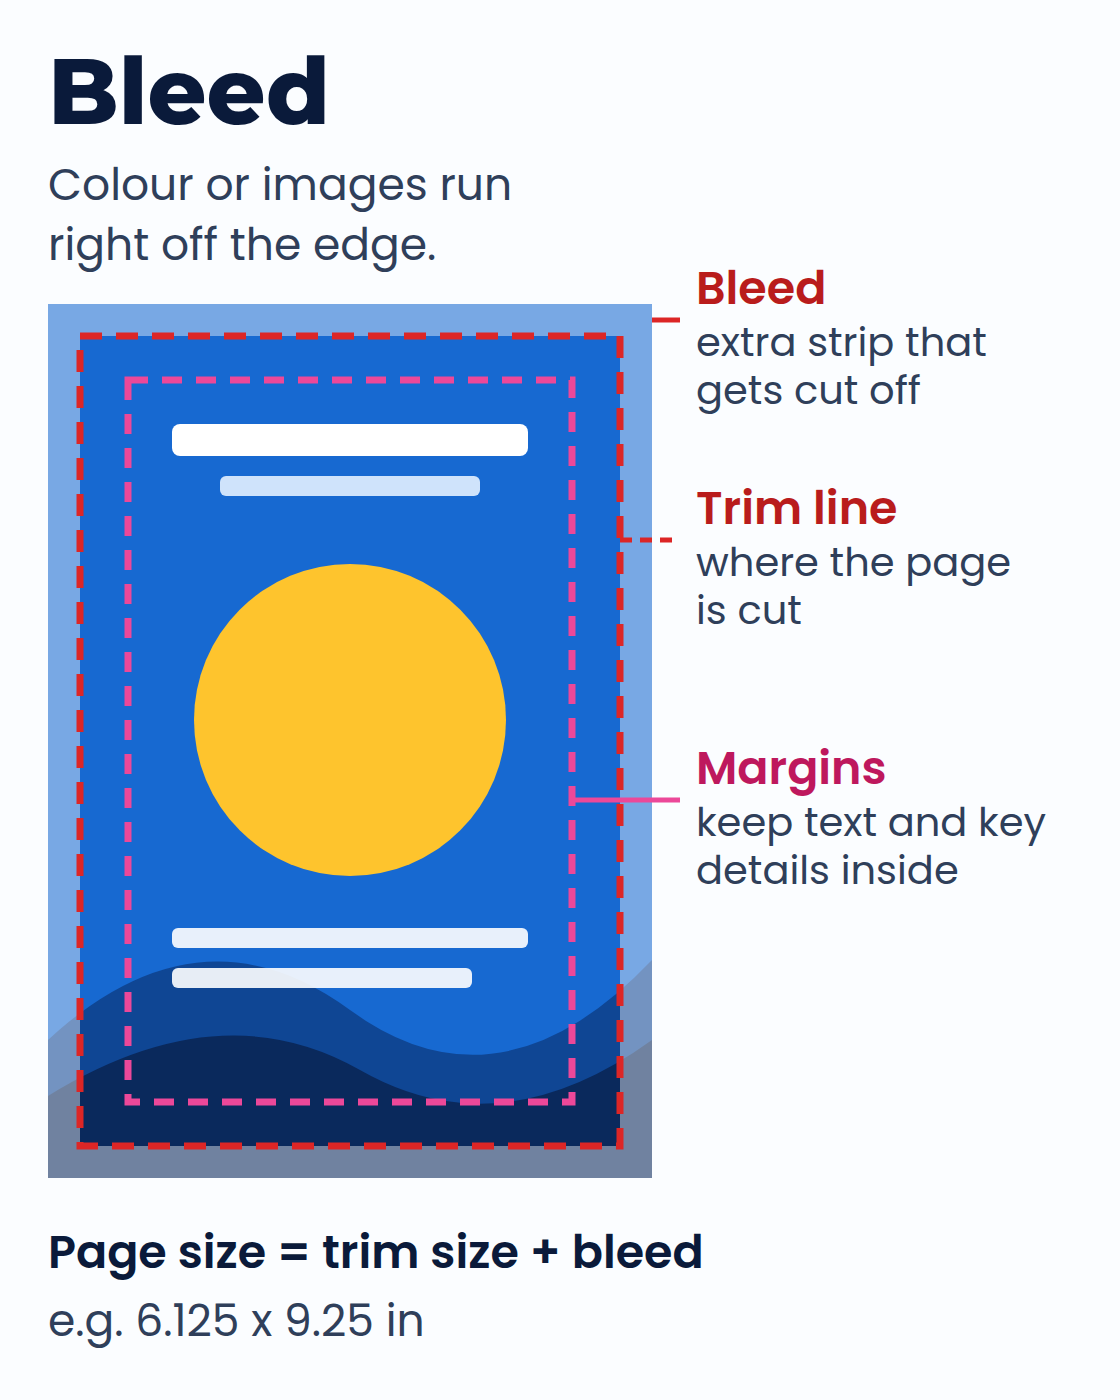
Bleed
Something on your page — a photo, a background colour, a border or a pattern — runs right off the edge of the page.
To make sure there’s no thin white line after the cut, you make the page slightly bigger than the trim size, and let your design extend into that extra area. That extra area is the bleed, and it gets cut off.
Use bleed when: any image or colour touches the edge of the page. For example, full-colour backgrounds, full-page photos or decorative borders that go to the edge.
Tip: If even one page in your book needs to go to the edge, set up the whole book with bleed. KDP applies the bleed setting to the entire interior.
What Page Size to Use in Canva
In Canva, click Create a design → Custom size, switch the units to inches, and enter the size below.
| Book (trim size) | No bleed | With bleed |
|---|---|---|
| 6 x 9 in | 6 x 9 in | 6.125 x 9.25 in |
| 8.5 x 11 in | 8.5 x 11 in | 8.625 x 11.25 in |
Why those numbers? KDP’s rule for bleed is to add 0.125 in to the width and 0.25 in to the height (0.125 in at the top and bottom, and 0.125 in on the outside edge — there’s no bleed on the spine side).
Tip: Because the bleed is already included in the page size above, export from Canva as PDF Print and leave “Crop marks and bleed” unticked. Turning it on adds extra space around every page, so your PDF no longer matches the size KDP expects.
When you upload your interior, choose the same option in KDP. Under Paperback Content → Print Options, set Bleed Settings to No Bleed or Bleed (PDF only) to match your file. Bleed only works with a PDF, so always upload a PDF.
KDP’s Margin Rules
Margins keep your content safely away from the edges and from the spine. KDP checks two of them:
Outside margins (top, bottom and the outer edge):
- No bleed: at least 0.25 in
- With bleed: at least 0.375 in
Inside margin (the gutter, on the spine side). This one grows with your page count, because thicker books curve more into the spine:
| Page count | Inside margin (gutter) |
|---|---|
| 24 to 150 pages | 0.375 in |
| 151 to 300 pages | 0.5 in |
| 301 to 500 pages | 0.625 in |
| 501 to 700 pages | 0.75 in |
| 701 to 828 pages | 0.875 in |
These are minimums. Leaving a little more space than this is always fine.
You can read the full rules on KDP’s help page: Set Trim Size, Bleed, and Margins.
Free Margin Templates
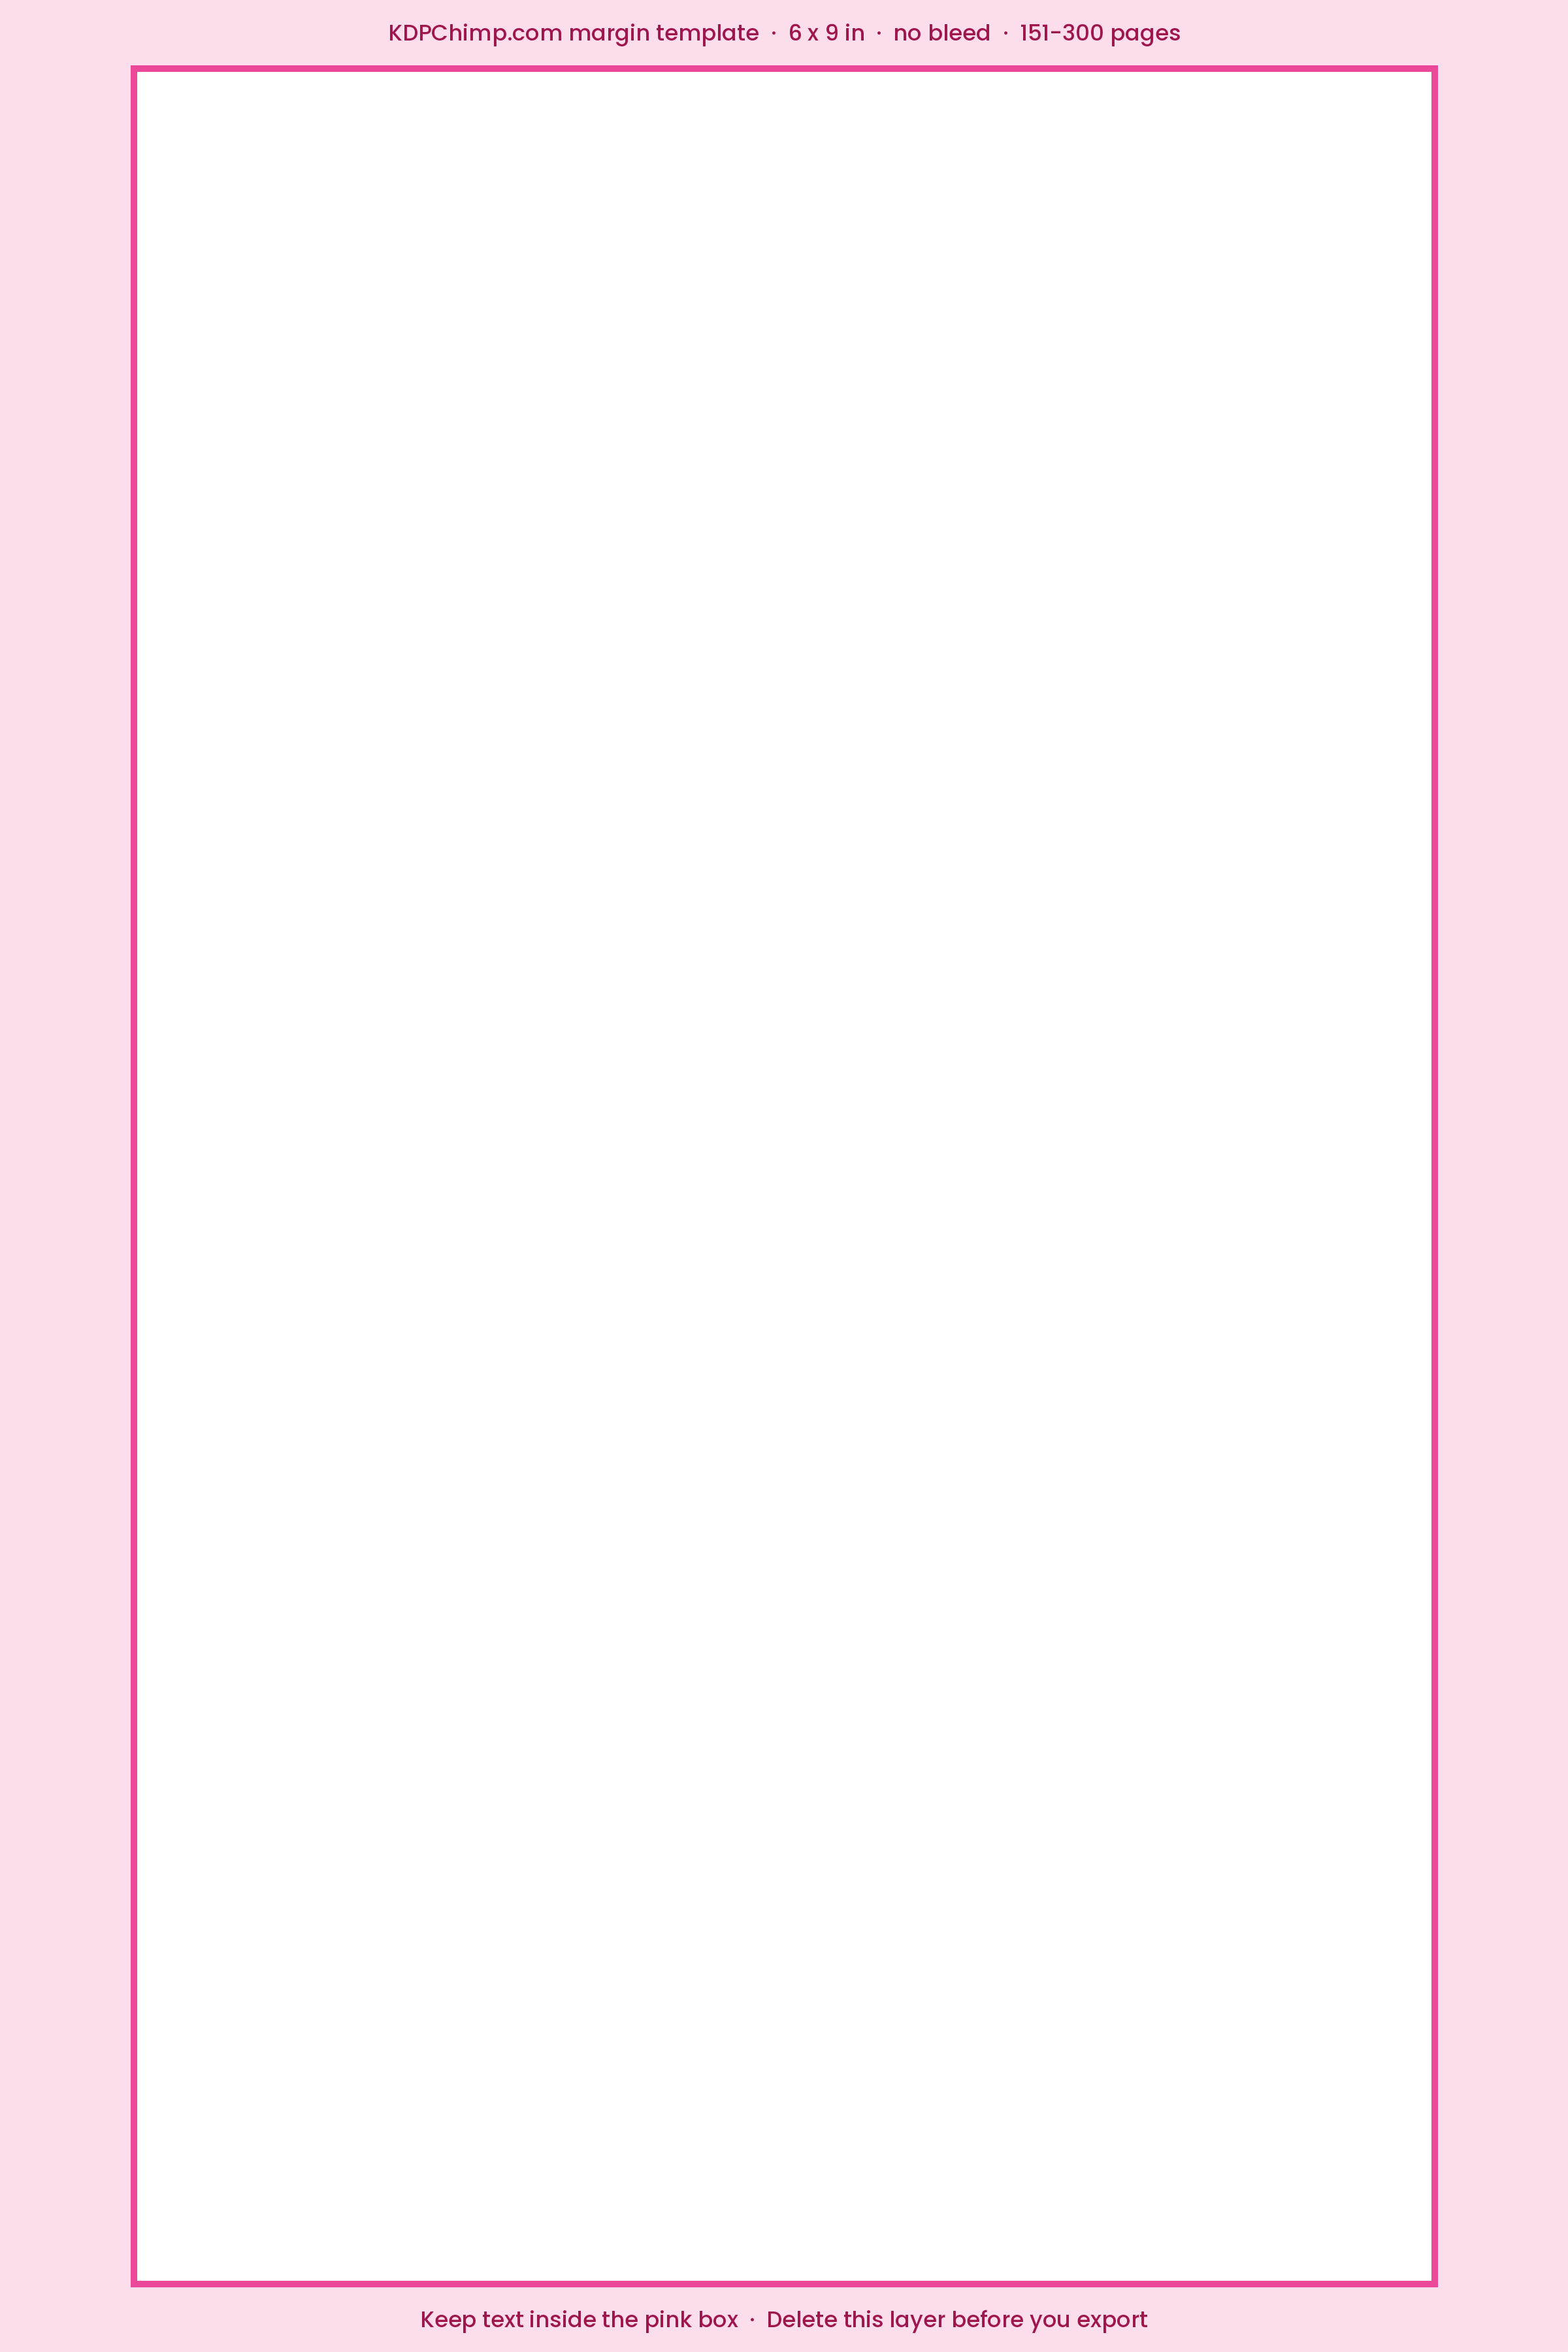
Instead of measuring margins by hand, use our free KDPChimp margin templates. Each one is a see-through PNG you lay over your page:
- Pink box: keep all your text and important content inside it.
- Pink area outside the box: KDP’s margins. Keep text out of here.
- Red strip and dashed line (bleed templates only): the bleed that gets cut off, and the trim line.
The pink box uses the inside margin on both the left and right, so the same template works on left-hand and right-hand pages.
Download all 8 templates (ZIP)
Or download just the one you need:
| Template | 24 to 150 pages | 151 to 300 pages |
|---|---|---|
| 6 x 9 in, no bleed | Download | Download |
| 6 x 9 in, bleed | Download | Download |
| 8.5 x 11 in, no bleed | Download | Download |
| 8.5 x 11 in, bleed | Download | Download |







They work in Canva and almost any other image editor.
Note: Pick the template that matches your page count. A longer book needs a bigger inside margin. For books over 300 pages, use the margin table above.
How to Use the Templates in Canva
-
Create your Canva design at the right size from the table above (no bleed or with bleed).
-
Upload the matching template (Uploads → Upload files) and click it to add it to your page.
-
Right-click the template and choose Set image as background. It’s already the exact page size, so it fits the page perfectly.
Tip: If your page has its own full-colour background, don’t set the template as the background (your colour would hide it). Instead, drag its corners out to the edges of the page, and keep it on top while you place your text.
-
Keep all your text and important content inside the pink box. Anything inside the pink box is within KDP’s margins.
-
Backgrounds and images that should bleed can go all the way to the edge — just keep text and key details inside the pink box.
-
When your pages are finished, delete the template from each page (or hide it).
-
Export as PDF Print and upload to KDP.
Tip: Before you publish, always check every page in KDP’s Launch Previewer. It flags anything outside the margins so you can fix it before your book goes live.
Need Help?
If you get stuck, we’re happy to help.
Just send us an email at support@kdpchimp.com